


Good afternoon! I'm sharing my first project feature post and first ever tutorial over on the Some Odd Girl blog today! What do you think? Here's what I'm making:

Glass tile magnets, a pendant and a Prof Hoot keyring that I thought would be perfect for a wee graduation gift, especially if you made a matching card to go with it! HERE's one I made earlier that would match perfectly!
So, let’s get started! Here’s what you will need…
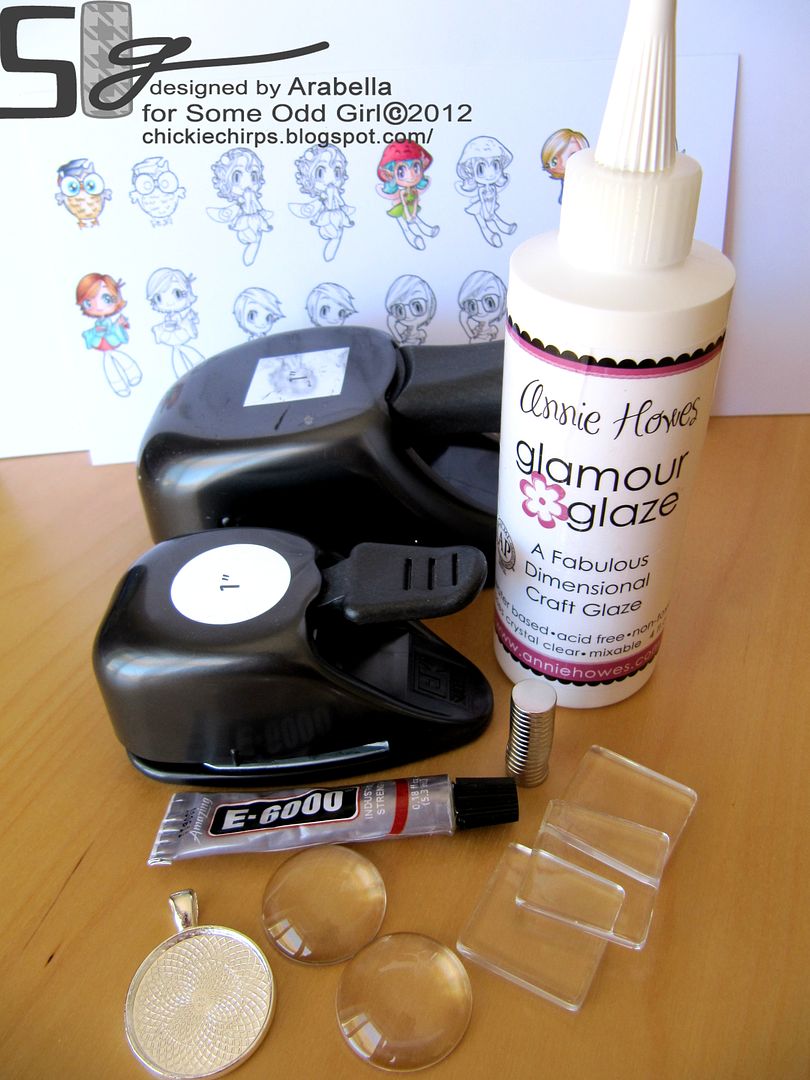
- Images to use on your tiles
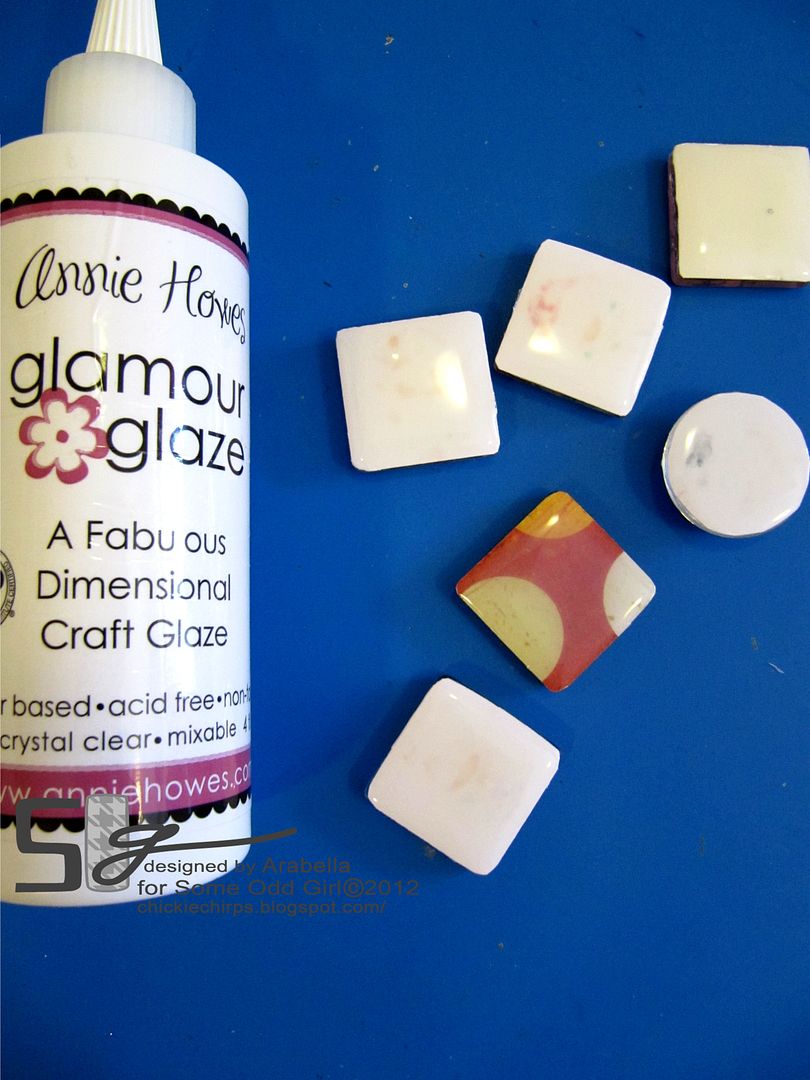
- Glossy Accents, Glamour Glaze or something similar
- Strong glue
- Pendant casings
- Glass tiles
- Punches to match the size of your tiles
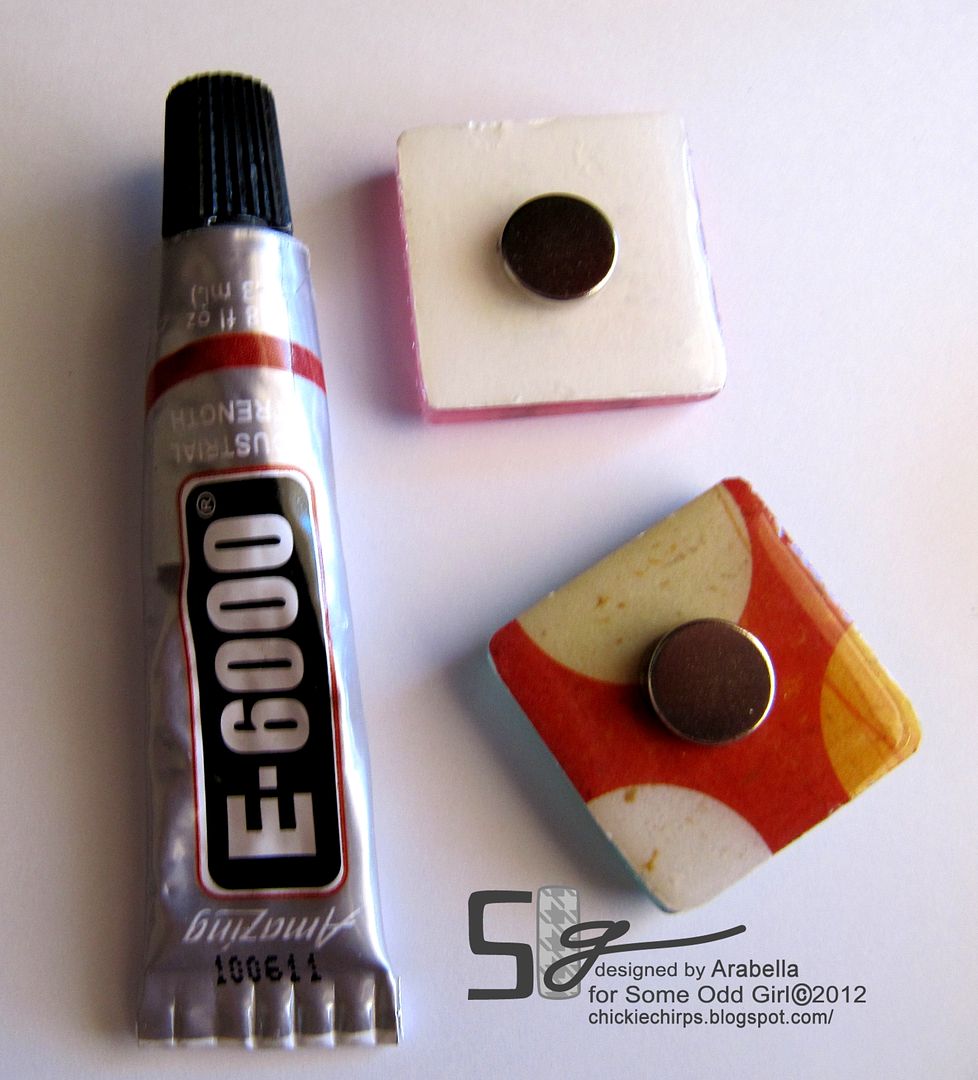
- Strong magnets if you want to make magnets
- Chain for the pendants or a keyring if you are making keyrings
I got my supplies from Annie Howes on Etsy and her shipping was super fast!
To start with, I resized my Some Odd Girl digital stamps down to very small in Word before printing them out. In retrospect I think next time I would leave just a little bit more space between them for the circular punch.
I coloured my images in with copics. Since they were so small they didnt take very long to colour. One tip for colouring small images with copics is that it may be easier to skip the middle colour in your blending trio and just use the lightest and darkest to blend with as it is a such a small area you are colouring and you don’t want to over-saturate the area.
Once the images are coloured, lay the glass tiles over the top to see how they will look and then punch them out (or cut them to size with a craft knife). I turn my punch over so I can see exactly where it is punching:

For the square tiles, you can round the corners of the images with detail scissors now before you start the gluing stage. As well as images, I stamped some SOG sentiments onto colourful scraps of DP to use as magnets.
The next step is to clean the tiles before adding a blob of Glamour Glaze to the top of the image or sentiment and placing tile on top. I found the easiest way to do this was to put the blob of glue in the centre and then lay the tile on top and smoosh the glue to the edges.
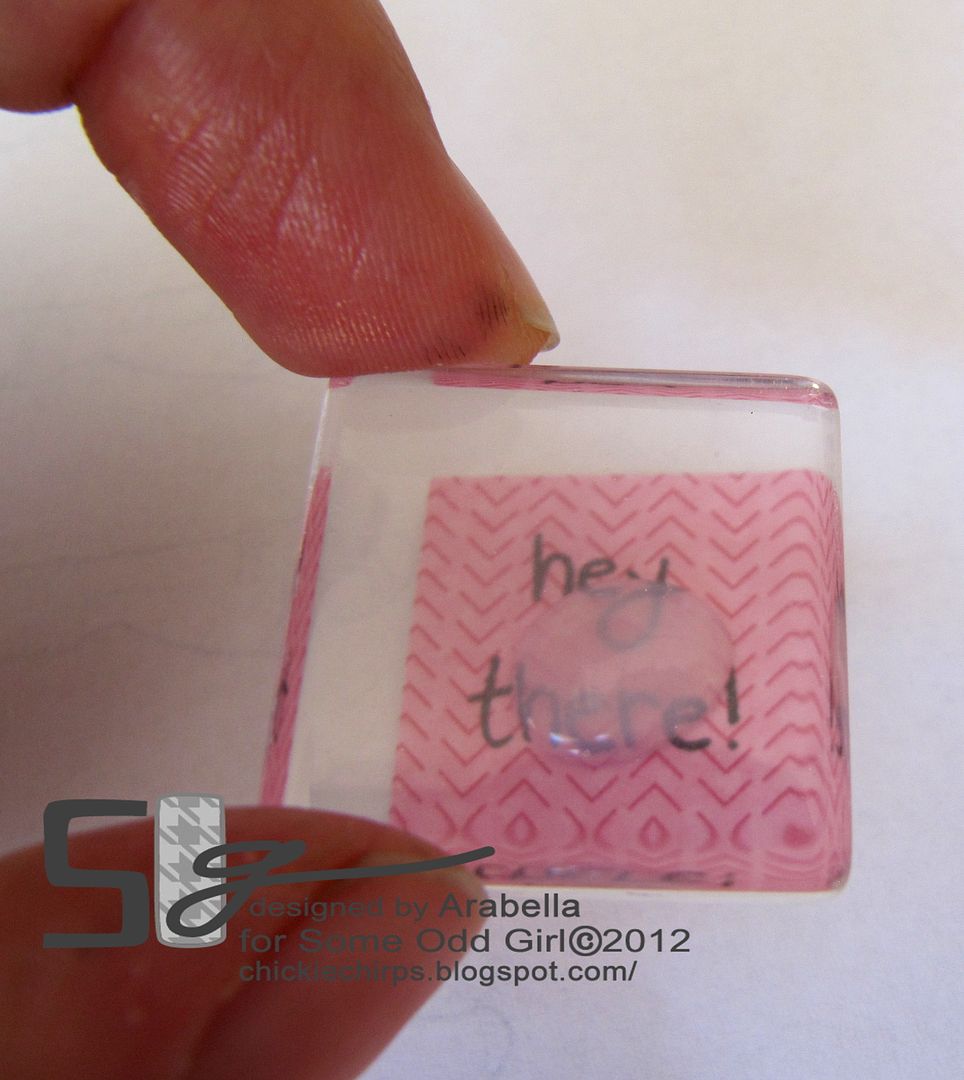
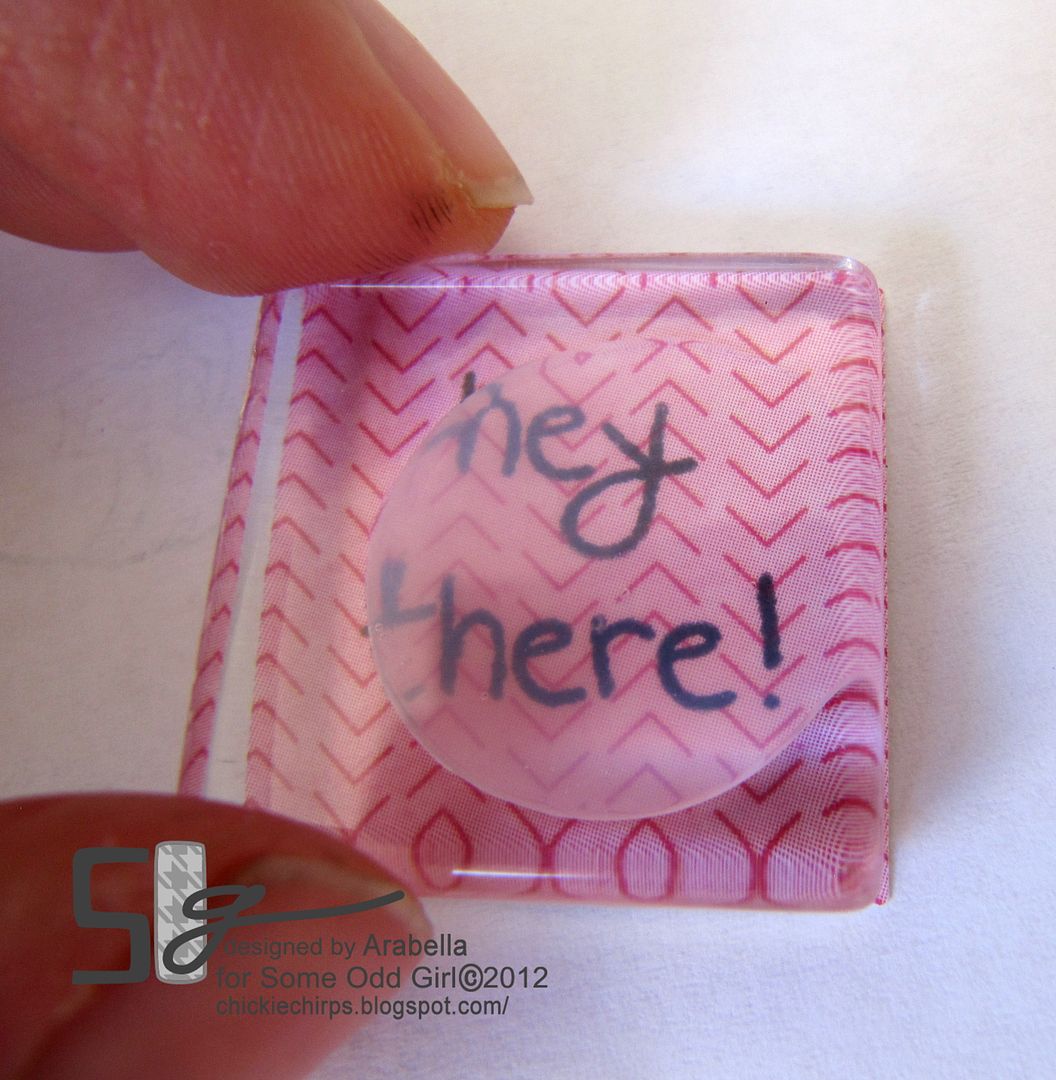
Let the tiles dry for a few hours (preferably on a non-stick baking sheet). Then turn them over and coat the back surface with the Glamour Glaze as well before leaving them to dry overnight.
Once the glaze is dry, you can decide what you want to do with the tiles. Use the super strong glue to add magnets to the back or glue the tiles into pendant casings. I suggest purchasing the very strong Neodymium magnets if you are going to make magnetic tiles as there is nothing more annoying than fridge magnets that won’t hold anything up!
Something else I discovered while making these is that the Copic Opaque white on Prof Hoot’s eyes smudged when I added the glue, but the pen I used on the girl’s eyes did not. I’m not sure if that was because I didn’t let give the Copic Opaque white time to dry properly first or if it just does that. I would recommend you experiment with that. I also noticed that some of the reds smudged a bit… I suspect that is because the ink was over-saturated in those areas.
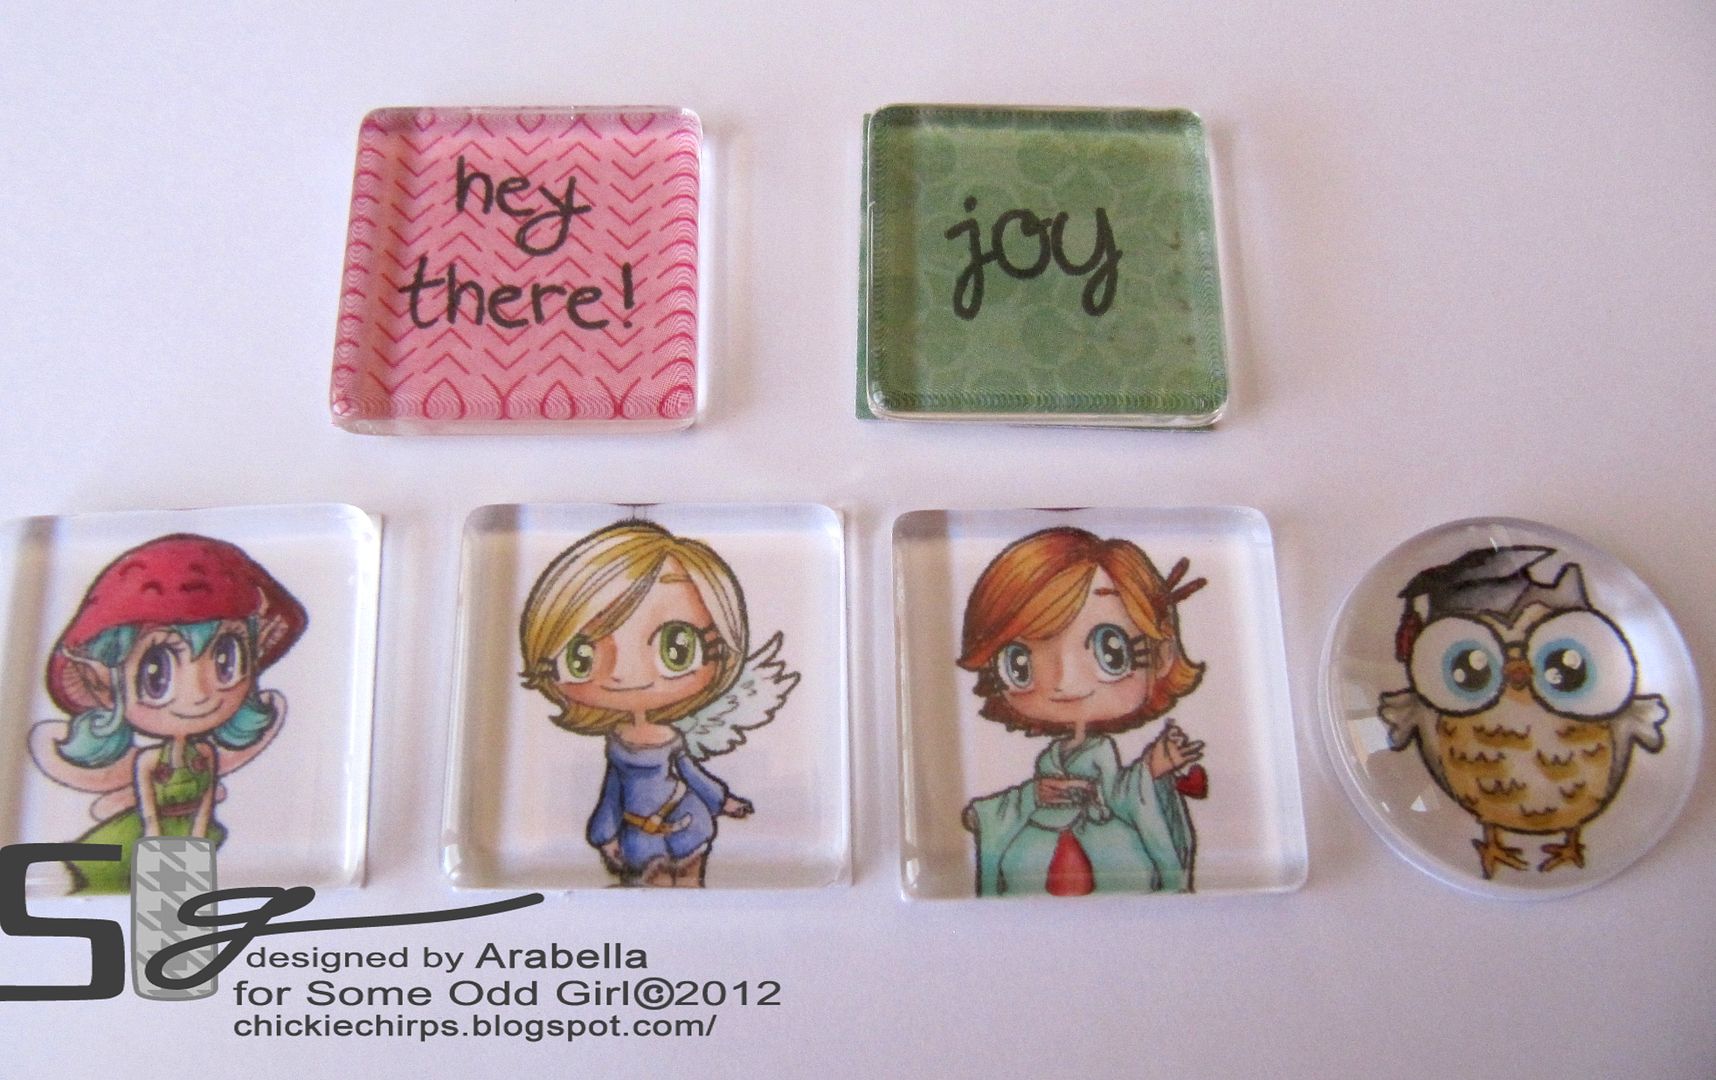
Here are my finished pendants:
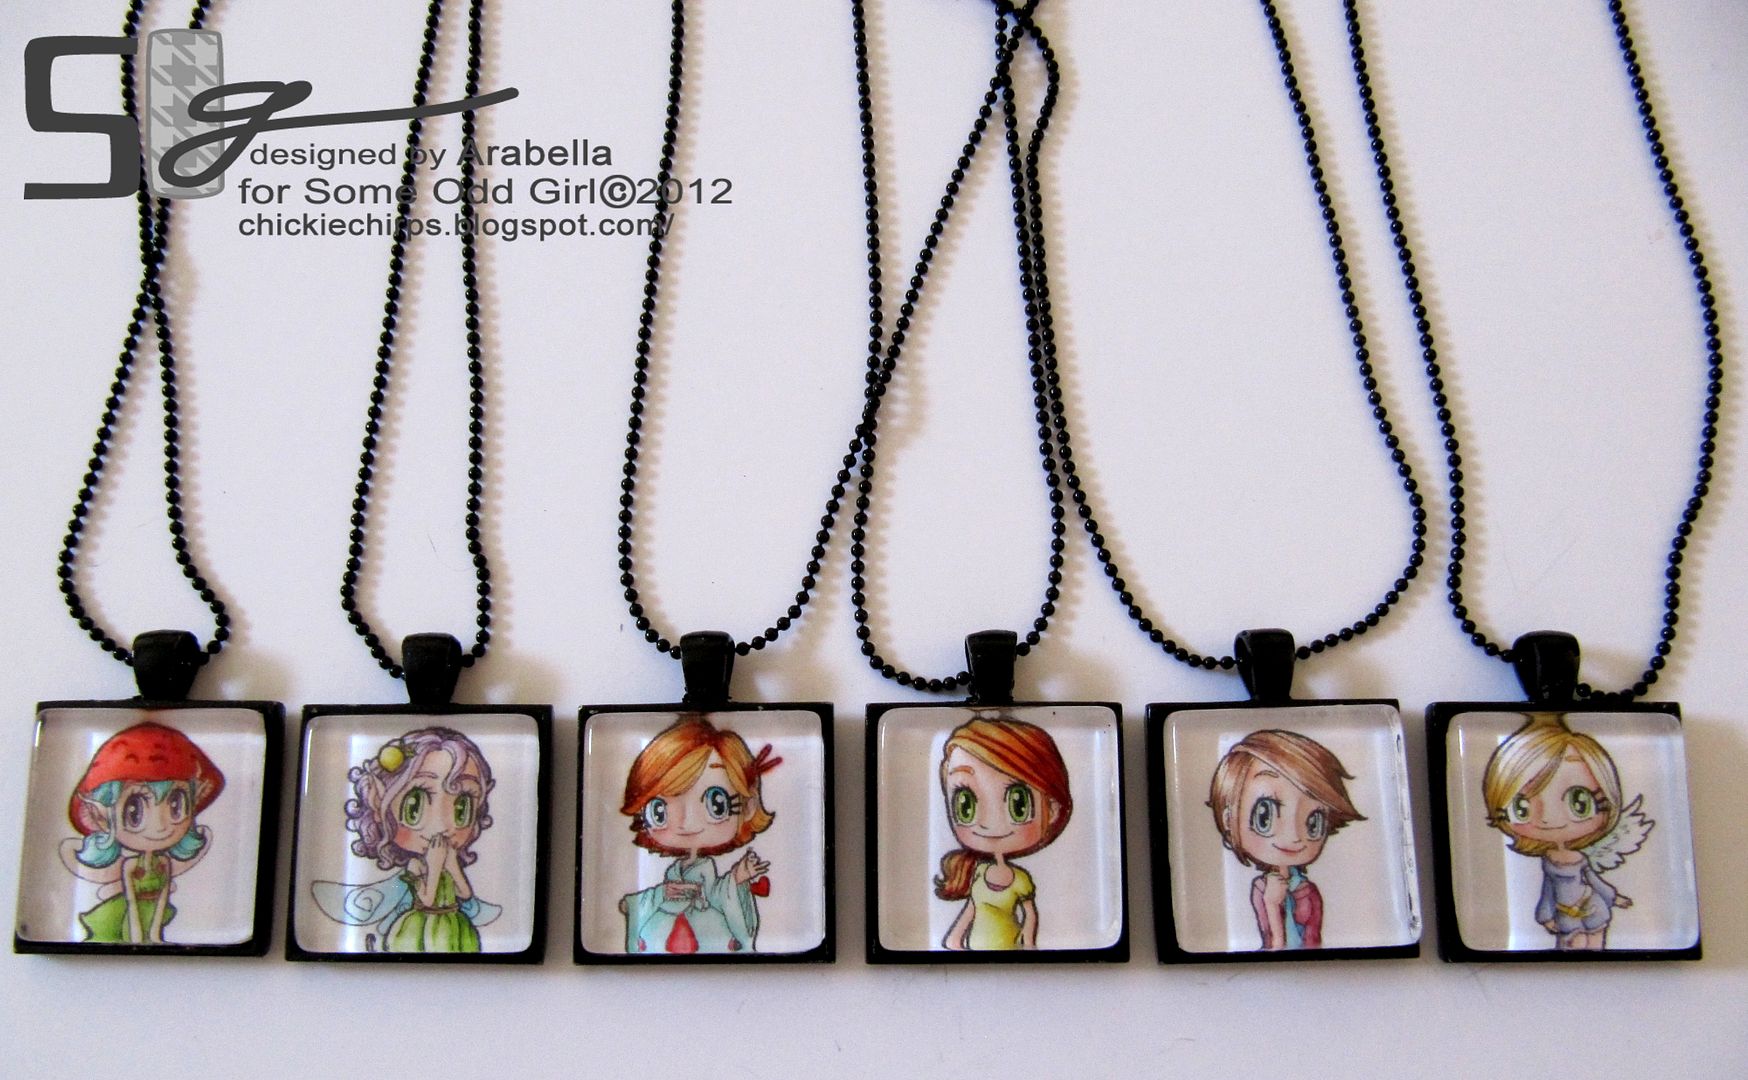
These images are all available in the SOG shop. From left to right I have here:
I hope you enjoyed my wee tutorial!
Arabella


14 comments:
Arabella these are amazing...I love this idea and the come out so cute...so creative and fun..
Arabella, this is a brilliant idea and tutorial! I want them, I want them all. Where's your boat parked today, I'll just nip over to collect... xx
Wow, what a great idea! LOve them, must try it!
Hugs, Evy
You are AMAZING! I love every piece you made! I tried working with some Shrinky Dinks paper last weekend, that stuff is challenging! I have tried to do something close to this before, but it seemed like it never fully dried right. I used Glossy Accents. Do you think the product you used works better?
ooo great tutorial
love your work, become a follower
wowwwwwwwwwwwwwww amazing!!!!! very very pretty jewel's!!!!! i like too mutch!!!!!!!!!!!
Arabella these are just perfect what a great idea and wow love the tutorial lovely to see something different and so cool!! Chanelle xxx
........OMG! Arabella this is amazing!!! I love them so much I want one! Oh what a perfect job it is just so cute I can't stop staring at them! YOu know I actually have the stuff to make these at home but you have done a beyond wonderful job...I could never do these are good as you! Eee look at that little owl! :D
Agree with all the above! Absolutely LOVE this idea... you're so, so clever.
Well done!
AB
oooh, they are so cool, Arabella! What a fab tute - more please!
Wow - these are amazing! SO love them!!
Wow these are all amazing!
Hugs,
Larissa
Wowzers...these turned out fantastic. I may have to give this a go...perfect for some of my kids.
Shelby
All I can say is too cool, I LOVE these!
Post a Comment